top of page

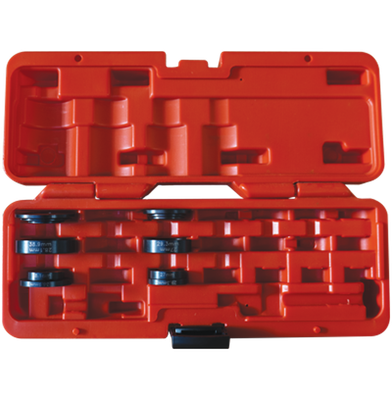
Parking Sensor and Lens Hole Maker
SKU DF-EZ10
$225.08
In stock
1
Product Details
UPC:
00811662030621
DOWNLOADS: Instructions | Flyer
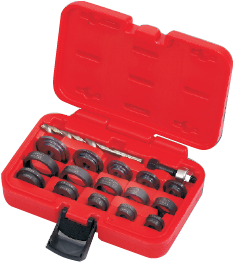
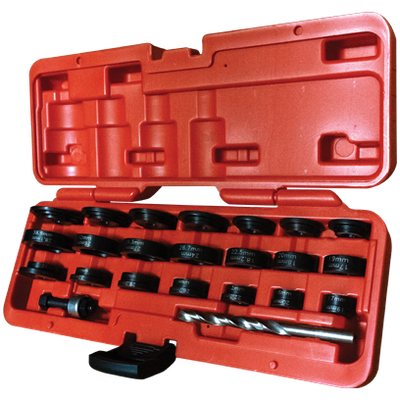
The Parking Sensor and Lens Hole Maker (Part No. DF-EZ10) from Dent Fix Equipment is the precise and clean way to create holes in order to install driver assist sensors on replacement bumpers.
The DF-EZ10 system is designed to punch a hole in the bumper or fender without damaging the paint.
Ease of use combined with a wide variety of sizes, makes this tool a must have for any shop.
Able to
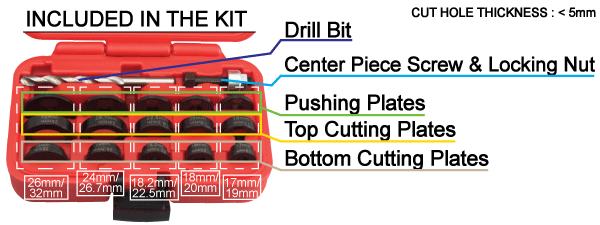
cut holes in plastic bumpers up to 5mm in thickness, the kit includes a
5/16" HSS drill bit to create a guide hole and varied discs that can punch holes in the following sizes (mm):17, 18, 18.2, 19, 20, 22.5, 24, 26, 26.7, & 32.
Instructions

- Determine the location of the sensor on the inside of the bumper cover or part. If there is no indication of the sensor hole location follow the manufacturer’s recommendations for determining the proper hole location.
- Drill a pilot hole in the middle of the sensor location with the included drill bit and drill (not included).
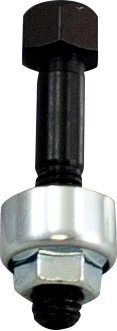
- Once the desired sensor hole diameter is determined, select the corresponding 3-pieces plate column from the kit. (Pushing Plate/Top Cutting Plate/Bottom Cutting Plate). Each column cuts 2 different sizes.
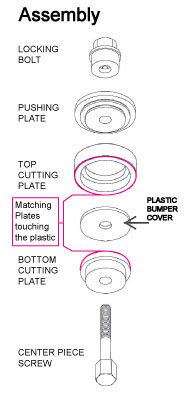
- Assemble (See Diagram) the Bottom Cutting Plate to the Center Piece Screw with the desired hole size facing the plastic.
- Slide the Screw through the pilot hole on the outside of the plastic bumper cover with Bottom Cutting Plate touching the paint side.
- Place the matching Top Cutting Plate (from the column) to the Screw on the inside of the bumper cover. The desired cutting size should be facing the plastic.
- Install the Pushing Plate on the Screw, on top of the Top Cutting Plate. The Pushing Plate’s flat piece (with Dent Fix Logo) is facing away from the Top Cutting Plate.
- Install the Locking Bolt on Screw end. Screw on hand tight with hand tools. DO NOT USE PNEUMATIC TOOLS!
- Take a 12mm ratchet wrench (not included) and tighten the screw until the hole is punched.
- Reverse the locking bolt to separate the tool from the bumper.
WARNING: Cancer and Reproductive Harm - www.P65Warnings.ca.gov
Parking Sensor and Lens Hole Maker
You May Also Like
NEW
EZ Punch & Lens Hole - Upgrade Kit XL
EZ Punch & Lens Hole - Upgrade Kit XL
SKU DF-EZ10UP
$89.00
Display prices in:
USD
bottom of page

